The best fish finder on the showroom wall can become a frustrating piece of equipment the moment it is mounted in the wrong place. A screen that looks enormous from arm’s length is hard to read when you stand six feet away on the bow. A display mounted perfectly at the console may block a throttle, windshield sightline or storage lid. Add a second screen without thinking through its purpose, and you can end up with twice the clutter but not twice the useful information.
A practical fish finder screen layout starts with what you need to see and where you stand or sit while fishing. Before buying a bigger chartplotter, decide what each station must help you do. At the console, you may be driving, surveying structure with side imaging, checking a chart or returning to a waypoint. At the bow, you may be casting while standing, tracking a lure on live sonar, controlling a trolling motor or holding a position in wind. Those are different viewing distances, postures and safety demands. The right layout follows the work.
This guide answers a narrower question: how should you plan a bow-and-console fish finder setup that is readable, safe and suited to the way you fish? We compare one-screen, two-station and dual-screen-at-the-bow layouts, use a no-drill mockup, explain mount geometry and review store-listed Garmin, Lowrance and Humminbird examples without assuming accessory compatibility. If you are still choosing sonar technology, screen specifications or a buying budget, start with our general fish finder buying guide instead; this article begins once you need to decide where each display belongs.
What this bow-and-console layout guide covers—and what it does not
This is an installation-planning and screen-placement guide, not a general ranking of fish finders. Its central decision is whether your actual fishing routine requires a console display, a separate bow display, or two simultaneous bow views—and whether the boat can safely accommodate the arrangement. The result should be a written, boat-specific layout brief that a buyer or qualified installer can verify before ordering or drilling.
For sonar types, maps, price tiers and broad product selection, use the Trolling Motors Direct fish finder buying guide. For model-to-model sonar sharing and networking, consult the exact manufacturer’s compatibility documentation; this article deliberately does not promise cross-model interoperability. The decision matrix below is an editorial planning tool, not a manufacturer-approved mounting design or a statistically validated recommendation system.
Start with your fishing day, not a screen-size number
Imagine a tournament angler who surveys points with a transom-mounted SideScan transducer, marks brush at the console, then moves to the trolling motor to fish it. One console display and one bow display can make sense because both stations are used regularly. Now imagine a small-boat owner who never fishes away from the helm: a second bow screen may add cost, weight and cables without improving a typical day.
A third angler spends most of the session standing over a trolling-motor pedal while watching forward-facing sonar. For that person, a well-positioned large bow display may be more useful than a second console unit. No layout is automatically “professional.” The correct answer is the one you can see, reach and operate without compromising safe boat handling.
Four questions that define the rig
- Where do you actually stand or sit? Mark the places where you read the screen for more than a few seconds.
- Which view needs the most space? A full-screen sonar image, a chart-plus-side-scan split and a four-panel layout demand different amounts of display real estate.
- How far away are your eyes? Test the real distance wearing the sunglasses you use on the water, not at a retail counter.
- What moves nearby? Check the trolling-motor pedal, rod lockers, windshield, seat pedestal, hatches, steering wheel, throttle and stowed motor.
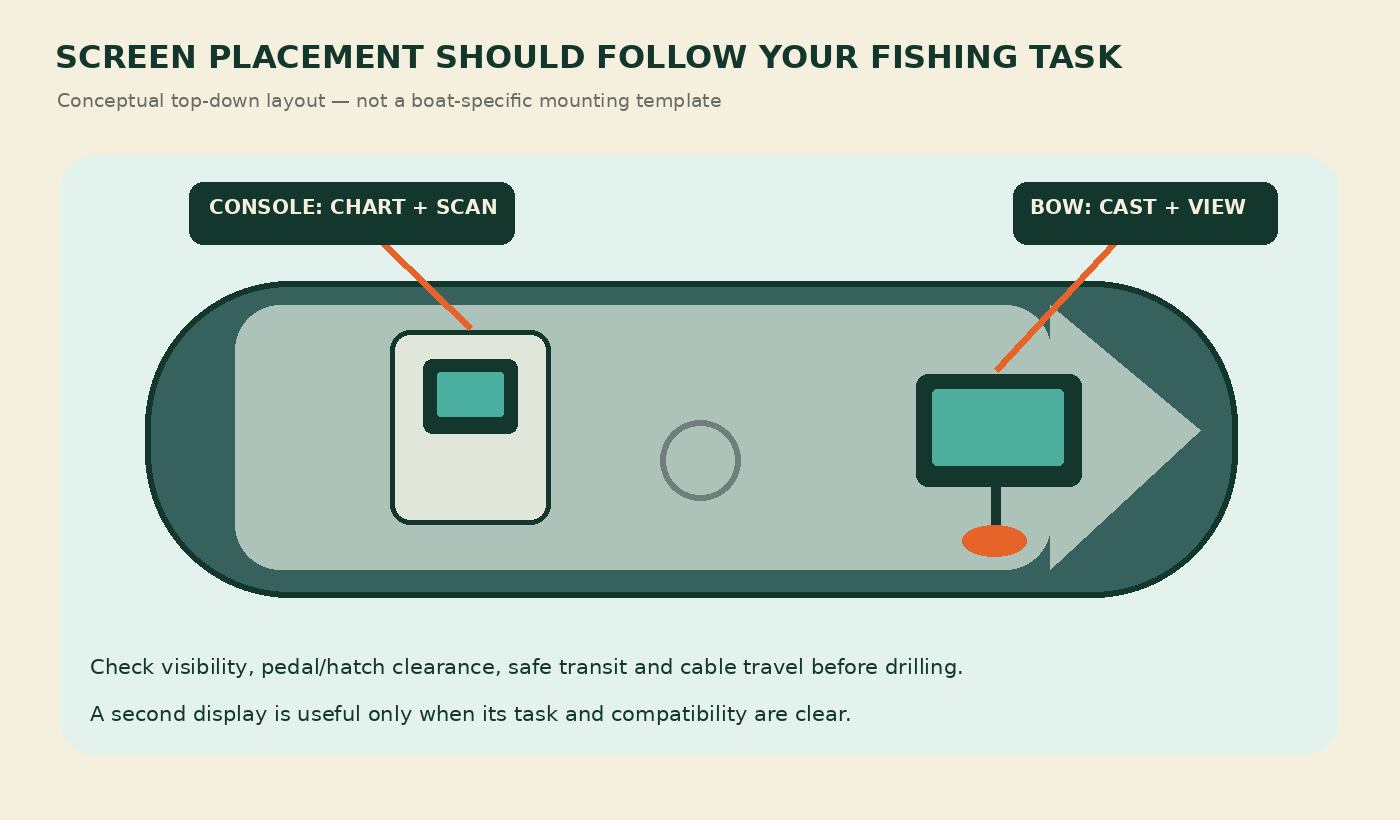
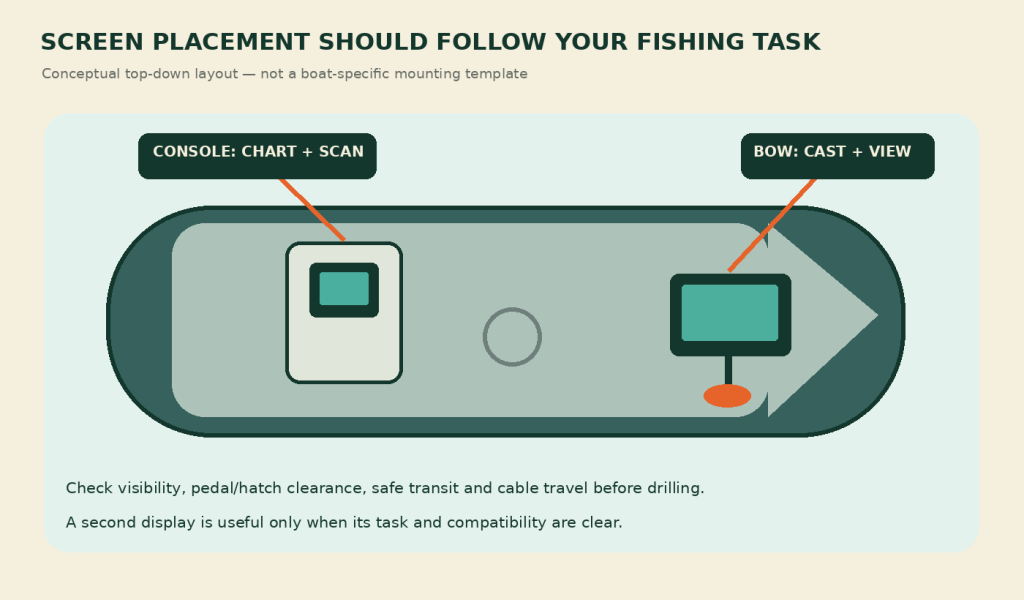
This original diagram illustrates task zones and lines of sight. It is not a fastening template and does not imply that every boat should carry three screens.
Fish Finder Screen Layout: Compare Three Practical Options
| Layout | Where it shines | Main drawback | Who should consider it |
|---|---|---|---|
| One display at the console | Navigation, charting and structure scanning from the helm | Hard to consult while standing at the bow | Small boats, occasional anglers and console-based workflows |
| One console plus one bow display | Each fishing station has a screen positioned for its task | More electrical load, mounting space and cable planning | Anglers who drive, scan and then fish from the bow |
| Two bow displays plus a console display | One bow screen can remain devoted to live sonar while the other shows charts or other views | Higher weight, visual clutter, cost and obstruction risk | Anglers who spend long sessions casting with multiple simultaneous views |
These are workflow patterns, not product compatibility claims. Whether two displays can share waypoints, sonar or live-imaging video depends on model-specific network capabilities; verify those separately before ordering. A second screen is not automatically a duplicate of the first one’s content.
Bow-and-console layout decision matrix: choose by the work, not the screen count
Use this original decision worksheet before buying hardware. It is a planning aid, not a manufacturer compatibility chart or a validated scoring algorithm. Answer each question for your actual boat and fishing routine. A safety or fit failure overrides every preference.
| Your observed situation | One helm/console display | Console + bow display | Two bow displays + console |
|---|---|---|---|
| You operate and fish almost entirely from the helm | Usually sufficient | Added bow screen may go unused | Usually unnecessary |
| You regularly scan from the helm, then cast from the bow | Awkward to consult from bow | Strong starting candidate | Consider only if simultaneous bow views are essential |
| You need two full-size, simultaneous views while casting | Requires compromises or screen switching | May still require switching at bow | Candidate if space, structure and power allow |
| You cannot read your current screen at normal fishing distance | First test a safer mount position or larger view | Test the bow viewing distance with a mockup | Extra screens do not automatically solve legibility |
| Mount obstructs helm sightlines, hatches or trolling-motor movement | Reject that placement | Reject that placement | Reject that placement |
| You cannot verify mounting strength, cable clearance or electrical capacity | Pause installation | Pause installation | Pause installation |
Apply the matrix in this order: (1) reject unsafe or physically impossible placements; (2) mark the stations you use on a typical fishing day; (3) list which views must be visible at the same time; (4) test actual viewing distance and full-motion clearance with cardboard; (5) verify device, bracket, cable, network and electrical compatibility by exact part number; (6) compare total installed cost—not only screen price. If the second screen does not eliminate a repeated inconvenience or enable a required simultaneous view, the simpler arrangement is often the better purchase.
Three worked decisions: A small helm-operated boat with no bow fishing station generally starts with one well-positioned console display. A bass boat that marks structure at the helm and spends hours casting from the bow has a practical reason to consider one display at each station. An angler who must monitor live sonar and charts concurrently at the bow may consider a second bow display, but only after confirming mounting loads, power supply, sightlines and device-specific sharing capabilities. These are reasoned examples, not universal prescriptions.
Document your choice: Write down the boat model, display and bracket part numbers, fishing positions, required simultaneous views, measured eye-to-screen distance, cable route, proposed fastening structure and manufacturer documentation consulted. This record gives a marine installer or product specialist a concrete basis for checking the proposed setup.
Why a split screen sometimes feels too small
A nine-inch display is measured diagonally. When you divide its useful area into a sonar pane and a chart pane, each gets only part of that surface. If you stand several feet away, small fish returns, depth figures and tiny labels can become difficult to interpret. A bigger physical screen may help, but resolution, brightness, viewing angle, anti-glare treatment and layout also matter.
Try a simple experiment. On the fish finder you already own, create the exact split you would use all day. Move to your normal standing position. Can you read the information you care about without bending forward? If not, first see whether the display can be positioned closer or higher before buying another unit.
Mount height: the invisible variable in screen readability
A display mounted directly against the deck may be fine when kneeling or sitting, but it can be awkward when you are standing over the trolling motor. Raising it brings the display nearer eye level and can improve the viewing angle. Raising it also increases leverage on the mount and deck, and moves the screen into the paths of rods, passengers and equipment.
The goal is not “as high as possible.” It is a position that feels natural while fishing and remains safe and secure while the boat is moving. Test a high and a low position with a cardboard screen cutout before drilling. If a removable or telescoping mount is being considered, use its manufacturer’s permitted stowed configuration when running in chop.
Choose a mount by movement and load, not appearance
Fixed bail or gimbal mount: An efficient option where a display stays at one station and only needs tilt adjustment. Garmin’s ECHOMAP UHD2 93sv package includes a tilt mount and quick-release cradle. The manufacturer’s installation instructions list bail, swivel-bail and flush-mount approaches for the wider family, but explicitly state that the optional swivel base is not available for the 9-inch UHD2 sv model. An aftermarket swivel mount is a separate product and must be checked independently.
Telescoping swivel single mount: Useful when a bow angler needs height adjustment and a view that turns. Trolling Motors Direct lists a Telescoping Swivel Single Monitor Mount that raises, lowers and swivels. Its store page says deck fasteners are not included, the tube can be removed from the base, and a HELIX 7 requires a separate adapter. Do not interpret the store’s broad fit description as a substitute for checking your exact gimbal plate and fastening surface.
Bridge or multi-screen mount: A bridge can organize screens over or near a trolling-motor pedal and reclaim deck space, but it can also place weight high above an area with repeated impacts. The store lists a 12-inch span bridge mount and a bridge double extender as separate hardware options. Verify how the parts combine, their load rating and the precise screen plate before treating them as a ready-made kit.
Flush mount: A clean choice for a console, provided the dashboard has sufficient depth and suitable access behind it. Cutting a dash is difficult to undo. Follow the model-specific cutout template, gasket sequence and clearance requirements; do not use dimensions from a different generation.
Before drilling, do the full-motion mockup
The easiest way to prevent an awkward installation is to simulate one. Cut cardboard to the outside dimensions of the actual screen including its bracket and the direction of any cable connectors. Tape it to a stable mock support at the proposed height and angle. For a two-screen layout, mock up both at once and leave the service space you will need around each mount.
The ten-minute no-drill test
- Stand where you normally fish; check the viewing angle while holding a rod.
- Sit or crouch as you would when landing a fish or adjusting tackle.
- Step on the trolling-motor pedal and sweep through normal controls without contacting the mock screen.
- Open every nearby locker, lift and stow the motor, and swing the seat pedestal through its travel.
- Pretend to turn or tilt the display. Your knuckles need space behind it.
- Place rods in their actual travel and fishing positions; long handles can strike a screen.
- Check sightlines forward from the helm. Nothing should hide navigation hazards.
- Imagine pounding chop. Could anyone fall onto the structure or snag clothing on it?
- Locate a real structural fastening point and accessible backing area below deck.
- Check that the proposed wiring path avoids sharp corners, steering gear, pedals and hinge travel.
A mockup is not a structural survey, but it exposes many expensive mistakes before the first hole is drilled.
What the manufacturer manuals actually require
Garmin’s ECHOMAP UHD2 mounting guidance specifies a viewing location with access to keys, a sturdy support and cables long enough to reach their destinations. The specification table lists 118 mm (4 5/8 in) of clearance to the nearest obstruction behind the chartplotter for the covered models. It also warns not to mount the display inside its model-specific compass-safe distance.
The exact measurements differ by model. For example, the store lists the Lowrance HDS12 PRO Active Imaging HD 3-in-1 as a 12-inch display. Before planning its mounting location, verify the precise model and regional manufacturer documentation for dimensions, unit weight, compass-safe distance and bracket clearance. Published figures for these specifications are not consistent across the sources reviewed; do not rely on a single retailer listing as an installation template.
Why an apparently strong mount can still fail the boat
A tall mount is a lever. The screen’s mass produces more twisting and bending force as the height above deck increases. A thin, unsupported fiberglass panel can flex or crack around fasteners even when the aluminum mount itself feels solid. Determine whether you can reach the underside, whether reinforcement is required and whether bolts, backing plates and sealants are appropriate for the deck material. A qualified marine installer should approve structural changes.
For a flush mount, Garmin warns that an oversized cutout can compromise device stability. Its instructions call for using the supplied template, checking the trial fit and ensuring there is room for the relevant cover-release latch. Those details are why drilling from a product photo is not a good plan.
Sun, glare, rain and polarized sunglasses: test the real conditions
Electronic screens do not exist in a lab. On a boat, direct sun shifts through the day, spray gets on the glass and polarized lenses can change perceived screen brightness depending on rotation and display design. Check the screen while wearing your usual glasses and rain gear. Move around the deck, not just directly in front of the mount.
A swivel can be valuable because it lets you turn the display away from reflections and aim it toward the person fishing. But rotating the graph also rotates connectors and cables behind it. The cable route must allow the full permitted movement without pulling or kinking wires. Avoid positioning a display in a place where a driver must look down for extended periods; navigation always takes priority over interpreting sonar.
Console and bow are not identical environments
At the console, keep the throttle and wheel reachable, preserve forward sightlines and make card slots and covers accessible. At the bow, think about repeated pedal use, deck movement and the stowed trolling motor. A tall display can be perfect for stationary casting yet undesirable during a rough run. Make the safe transit position part of the installation plan.
Compare three store-listed display examples by job
The following examples are verified store listings; they are not a compatibility matrix. Prices and availability can change, so neither is assumed here.
| Display example | Verifiable store-listed characteristic | Possible role | Buyer’s key question |
|---|---|---|---|
| Garmin ECHOMAP UHD2 93sv with GT56 | 9-inch display; the specified bundle includes a GT56UHD-TM transducer and tilt mount | Compact bow or console station | Is a split view readable from my standing position? |
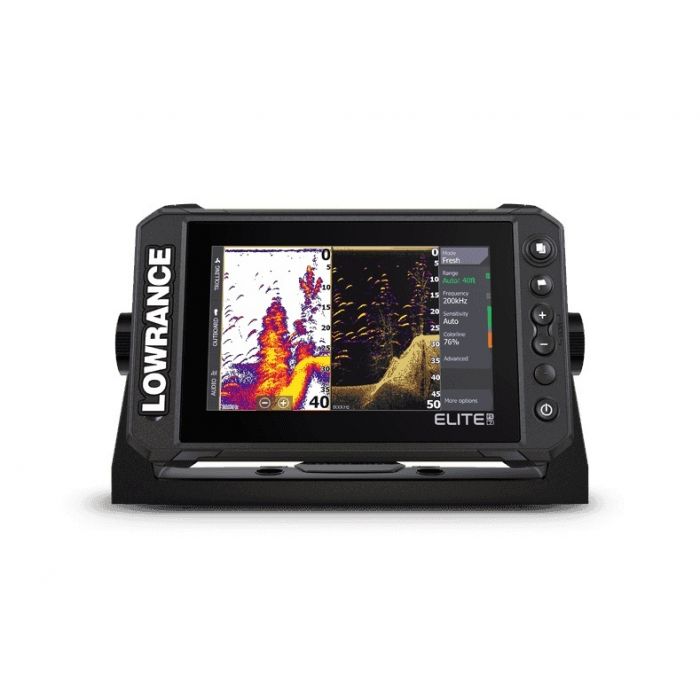
| Lowrance HDS12 PRO with Active Imaging HD 3-in-1 | 12-inch display; 1280 × 800 resolution per manufacturer; verify weight and clearance for the exact model | Larger console or bow view | Can my deck support the weight and full bracket travel? |
| Humminbird XPLORE 9 CMSI+ | 9-inch touchscreen/keypad; 1280 × 720 resolution; bundled transom transducer | Compact side-imaging or chart station | Do I need the included transducer at this location? |
The display that makes a compelling showroom demonstration is not always the one that best meets your standing viewing distance or deck geometry. Use these as examples of what to evaluate; order by model number and your actual workflow.
Two complete example layouts—without speculative compatibility claims
Example 1: Small bass boat, one screen at the console. The angler mainly uses charts and side imaging while idling, then fishes without watching a display continuously. A well-sited nine-inch unit at the console may be adequate. The first investment is a stable mount with clear controls, safe sightlines and a transducer positioned for the survey work. The angler delays the second screen until their fishing pattern genuinely requires it.
Example 2: Larger bass boat with long bow sessions. The helm needs charting and structure scans. The bow needs a display readable while standing, with room to work the pedal and land fish. One console screen plus one elevated, carefully positioned bow screen can separate tasks. If the angler later adds forward-facing sonar, they can test whether the existing bow screen’s split view is sufficient before installing another. Compatibility, source-sharing and any network expansion are separate manufacturer-specific checks.
Wiring and service access without turning this into a networking project
Every display needs a correctly protected power feed, adequate cable reach, strain relief and access for service. Some motors run on 24V or 36V banks; that does not mean a chartplotter should be connected directly to that voltage. For example, Garmin’s covered ECHOMAP UHD2 installation guide specifies 9–18 VDC input and a 3 A fast-acting fuse. Always use the device’s own input range and fuse specification, not the trolling motor’s.
Plan cable movement before fastening the mount. Telescoping and swivel hardware require a deliberate service loop, enough slack for permitted travel and a secure route that cannot rub on sharp metal. The store’s telescoping mount page explicitly cautions owners to leave slack for its height and swivel functions.
A two-layer installation plan
Layer one is mechanical. Confirm the deck or dash structure, accessible fasteners, bracket geometry, movement clearance, stowed position and serviceability. No power should be applied while drilling or handling open wires.
Layer two is electrical. Confirm the exact power-input range, manufacturer-specified protection, cable length, routing and connector access. Network and transducer sharing need a separate compatibility plan; neither physical proximity nor the presence of a similar-looking port proves interoperability. A trained installer should inspect complex or unfamiliar marine electrical work.
A decision worksheet before checkout
| Question | If yes | If no |
|---|---|---|
| Do I use sonar while standing at the bow for long periods? | Test a bow display at actual eye distance | A console display may be the sensible first choice |
| Does one screen’s split view stay readable? | Keep the simpler layout | Try a larger/closer screen before a second unit |
| Does the mount clear every hatch, pedal and stowed motor? | Continue structural inspection | Move the mount; do not drill yet |
| Can I access the underside for correct fastening or reinforcement? | Confirm proper mounting method | Ask an installer for another mounting solution |
| Are power and sonar/network requirements verified by exact model? | Build the parts list | Do not buy based on shared brand names alone |
| Do I have a safe transit position for high-mounted displays? | Include it in the operating routine | Reconsider the tall mount or location |
Once the answers are written down, buying is much easier: you can distinguish a display problem from a mounting problem and a mounting problem from a source-compatibility problem.
Frequently asked questions
Is a 9-inch fish finder big enough for the bow?
It can be, especially for one or two well-chosen views. Readability depends on viewing distance, position, resolution, brightness, layout and the information being watched. Test the real split-screen view at your normal standing position before deciding.
Would two 9-inch screens be better than one 12-inch screen?
Not automatically. Two displays can reserve different views, while one larger display may reduce wiring and deck clutter. If you only need a single full-screen sonar image, one well-positioned screen might be the more useful layout. Compare whole-system fit and manufacturer compatibility.
Can I swivel the Garmin ECHOMAP UHD2 93sv on its standard mount?
Garmin’s specific installation guide says its optional swivel base is not available for the 9-inch UHD2 sv model. A separate compatible aftermarket swivel mount may be an option. Confirm the exact plate, hardware and permitted movement with the mount supplier.
How high should a bow fish finder mount be?
There is no universal height. Make a temporary mockup and compare readability while standing, while operating the pedal and while the motor is stowed. Structural leverage and safe transit matter as much as eye level.
Can I mount a heavy 12-inch display on a thin deck?
Not on appearance alone. The deck and fastening arrangement must be adequate for the unit and its mount under vibration and wave impacts. Confirm the exact display and bracket weights from current model-specific documentation before calculating mounting loads. Seek structural guidance where deck reinforcement is uncertain.
Does a second screen automatically show the same live sonar?
No. Each model family has distinct network and sonar-sharing rules; some combinations support data sharing without sharing every imaging source. Confirm that exact pairing with the manufacturer’s current documentation before purchasing a second display.
Where should the screen go if I use polarized sunglasses?
Test the proposed model in the sunglasses you wear, with the screen rotated and tilted through the intended range in daylight. Mount and viewing geometry can matter as much as the manufacturer’s brightness claim.
What should I send a store before asking about a mount?
Send the display’s exact model number, the boat make and model, the proposed location, photographs of the deck and underside, and a brief description of whether you fish standing or seated. Include any nearby pedal, locker, rail or windshield that the mount must clear.
Design the installation once—and fish instead of fighting the display
A good chartplotter layout disappears into your fishing routine. At the console you can read the chart without losing sight of the water. At the bow you can watch the useful sonar return without stepping around the screen. The cables have room to move, the bracket has a secure foundation, and the motor and hatches travel freely.
Before buying a second unit, create the mockup and choose the task for every screen. Then browse Trolling Motors Direct’s graph selection alongside its electronics mounts. If you want a second check, email sales@trollingmotorsdirect.org with the boat, graph model and layout photos. Getting the physical fit right is cheaper than moving a hole after the first trip.